Elementor is a popular page builder for WordPress, known for its simple drag-and-drop interface and flexibility. It empowers business owners to design stunning websites without needing to code. But unfortunately, a good looking website does not make your site accessible to all users, including those with disabilities. In this article, we’ll explore why accessibility matters and how to build an inclusive Elementor site that meets international standards.
The importance of accessibility for Elementor websites
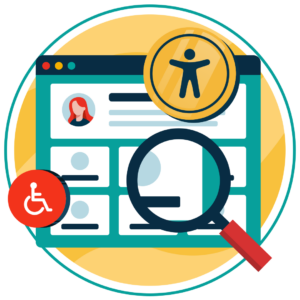
Web accessibility means ensuring that everyone, including people with disabilities, can navigate and interact with your Elementor website effectively. It’s not just about meeting legal requirements, it’s about making your content available to as many users as possible. With over a billion people worldwide living with some form of disability, accessible design is both an ethical responsibility and a way to expand your audience.
To achieve accessibility, it’s crucial to align your website with the Web Content Accessibility Guidelines (WCAG), the international standard for digital accessibility. Following WCAG ensures that visitors using assistive technologies, such as screen readers, can fully navigate your site, complete forms, and access information in videos. Ultimately, investing in accessibility helps build trust, enhances your brand’s reputation, and ensures your site is inclusive to all.
The risks of inaccessible websites that are built with Elementor
An inaccessible website can alienate a significant portion of your audience, including people with disabilities who rely on screen readers, keyboard navigation, or other assistive technologies. When your website isn’t accessible, you’re not just losing potential customers; it sends a message that some users are less valued.
Beyond the ethical responsibility of inclusion, failing to prioritise accessibility can severely damage your brand’s reputation. Word of mouth spreads quickly online, and users who find your site difficult or impossible to use may share their negative experiences publicly.
Legal consequences are also a real concern. Many countries enforce digital accessibility laws and standards. For example, in the United States the Americans with Disabilities Act (ADA) applies to all public websites, and the European Union has similar requirements under the European Accessibility Act (EAA). Non-compliance can result in costly lawsuits, fines, and remediation orders.
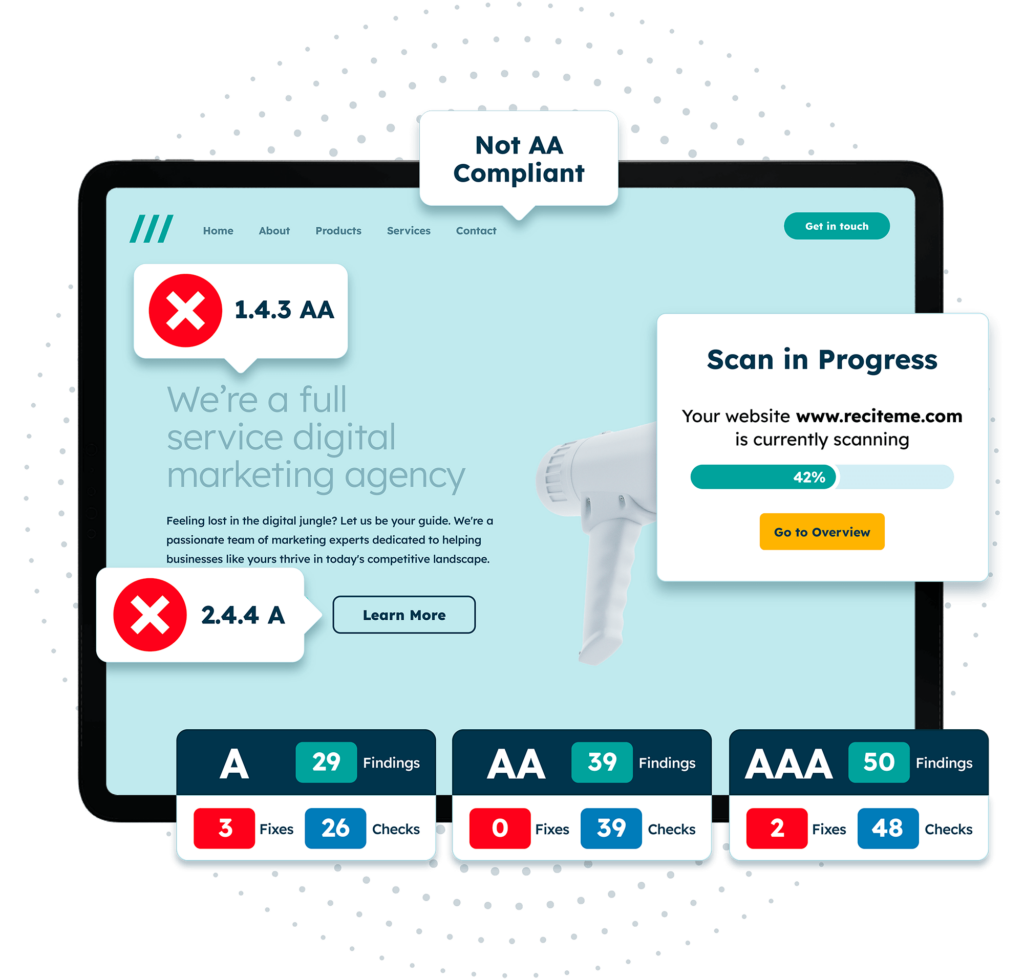
Get a Free Accessibility Check of your Website
Get a free automated accessibility scan of your websites homepage. This will identify and highlight any compliance issues on your website. Followed by recommendations on how to implement the necessary changes to make your website more accessible.
How to build an accessible website using the Elementor builder
Elementor makes it easy to design stunning websites, but that doesn’t mean your site is always accessibility-ready by default. To build an inclusive site, you’ll need to combine Elementor’s features with accessibility best practices, from proper heading structure to keyboard navigation. But don’t stress, we’ll walk you through each element below.
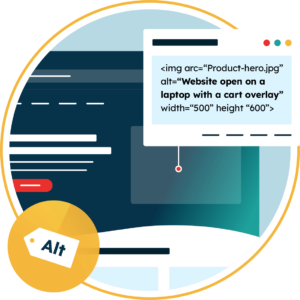
Use descriptive alt text for images
Visually impaired people can’t see the images on your site, so screen readers read out the image alt text (alternative text) to them. So it’s vital every image has alt text, unless it is purely decorative (like a border). When writing your alt text, don’t use vague labels like “Tree,” aim for more detail, like “Large oak tree in a park with a wooden bench underneath it.”
To add image alt text in Elementor, select your image in the Media Library, then find the Alt Text field and type your description there. Then click Insert Media to add the image to your page.
Implement disability-friendly fonts
It’s easy to get carried away by the endless array of fonts available online. While many are highly creative, they can often be difficult for visitors to read.
It’s best to choose accessible fonts that are simple and highly legible, such as Arial, Helvetica, or Verdana. These fonts, available in Elementor, feature clear shapes and consistent spacing, making them easier for everyone to read.
You can set global typography for your Elementor site in Site Settings > Typography, and customise fonts per widget under the Style tab.
Follow a logical heading structure
Use proper heading tags (H1, H2, H3, etc.) to structure your content, rather than styling text to look like a heading (by making text bold or using a different font type).
H1 is the main title, H2 sub-sections under H1, and H3 subsections under H2. This hierarchy helps users and screen readers understand the page’s layout and importance of each section.
Elementor’s Heading widget makes it easy to choose the right HTML tag, ensuring screen readers can navigate your content effectively.
Check that your Elementor forms are accessible
Whether you want users to subscribe, buy, or get in touch, everyone should be able to use your website forms. Make sure every form field has clear labels, is easy to navigate with a keyboard, and shows understandable error messages.
Elementor Pro’s Form Widget is a good option because it provides clear labels, keyboard navigation, and proper colour contrast. Pressing the Tab key moves through fields in order, while Shift-Tab moves backward, ensuring everyone can complete your form easily without needing a mouse.
Include descriptive anchor text for buttons and hyperlinks
Buttons and hyperlinks help users navigate between different pages or websites with a single click. Hyperlinks usually appear as underlined text (known as anchor text), but can also be images or other visual elements.
To add a hyperlink in Elementor, use the Text Editor widget. Simply highlight the text you want to link, click the link icon, and paste the URL.
Make sure your anchor text is accessible to all users, including those using screen readers. You can do this by writing descriptive text like “Jump to services” instead of generic links like “Click here”.
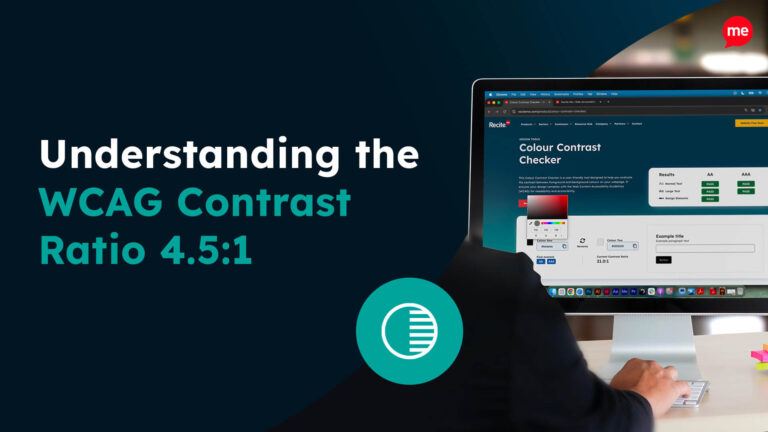
Provide clear colour contrasts
Low colour contrast makes content hard to read, especially for users with vision impairments. Elementor allows you to adjust text and background colours in the Style tab, but always test your design against WCAG guidelines. Aim for a minimum contrast ratio of 4.5:1 for regular text and 3:1 for large headings, and ensure that all text opacity is set to 1.
It can be tricky to calculate contrast ratios for non-grayscale colours. To make this easier, use a Contrast Checker tool to test the contrast between foreground and background colours and verify that your design meets accessibility standards.
Incorporate skip to content links
A skip to content link (also called a jump link) is an important tool for keyboard and screen reader uses, as it lets users quickly bypass repeated navigation and go straight to the main content.
Elementor doesn’t include them by default, but you can add one manually using the HTML widget:
Drag an HTML widget to the top of your page or inside your header template.
Paste your skip link code into the widget. Here is a standard example: <a href=”#main-content” class=”skip-link”>Skip to main content</a>
Make sure your main content area has an ID that matches the link (e.g. <div id=”main-content”> or a section with the ID “main-content”).
Style the link using custom CSS in Elementor’s Custom CSS section. It’s common practice to visually hide the link until it has focus (for example, by pressing the Tab key). This ensures the link is accessible to those who need it without cluttering the page for everyone else.
Avoid flashing images and animations
Elementor offers a library of animations under Advanced > Motion Effects. But beware that fast-flashing visuals have the potential to trigger seizures or disorient users. If you decide to use these animations, choose carefully and avoid anything that flashes more than three times per second.
Only use plugins that are WCAG compliant
Elementor supports many third-party plugins, but not all meet accessibility standards.
To assess the accessibility of a WordPress plugin, you should first check its documentation for mentions of accessibility features and WCAG compliance. It’s also a good idea to test plugins thoroughly before adding them to your site.
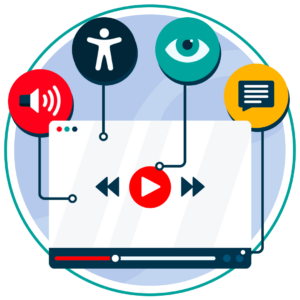
Ensure captions and transcripts are provided for videos
Accessible videos should have captions for spoken content and a transcript describing key visuals. Elementor’s video widget lets you easily embed videos into your website either from a self hosted file or from an external source including YouTube, Vimeo & DailyMotion. However it only supports automatic captions for embedded YouTube videos.
To add captions to self-hosted videos, you’ll need to manually add them using a video editing software or captioning service, then upload the video with captions included.
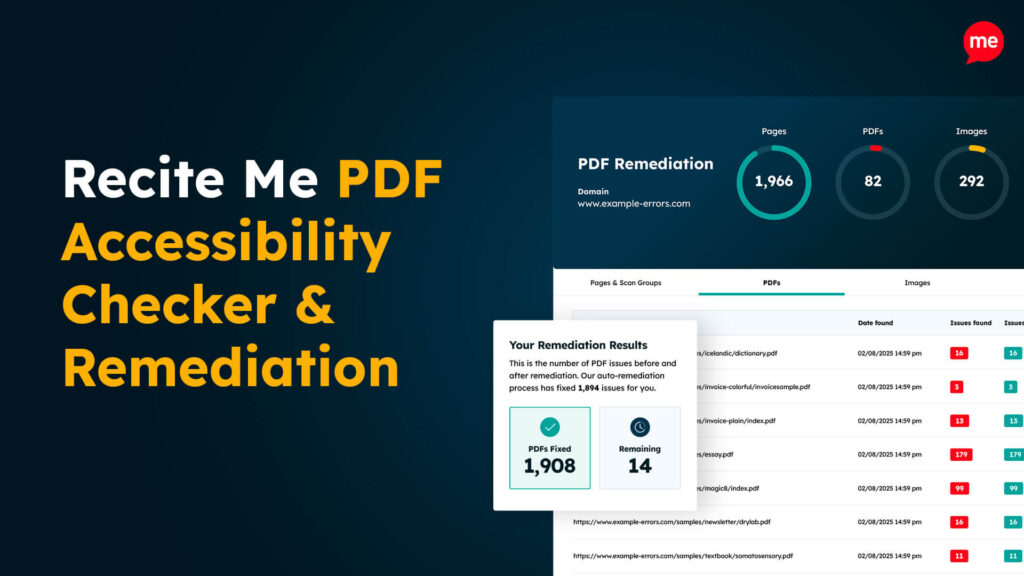
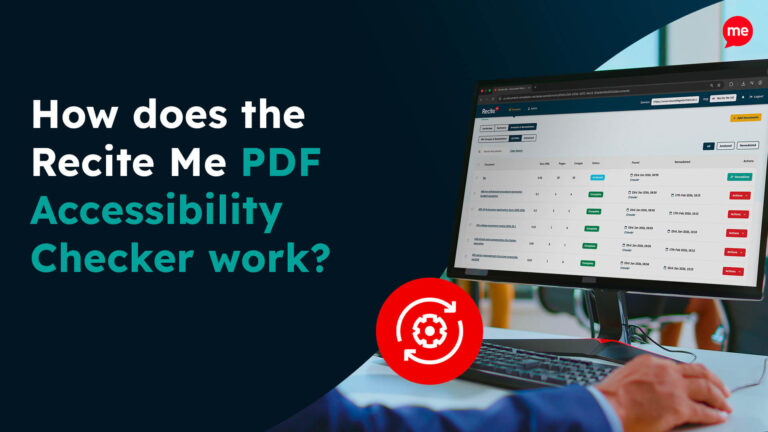
Check any PDFs on the website are accessible
PDFs shared on your website need to be accessible to everyone, including users with disabilities. To achieve this, ensure each PDF is properly tagged with headings, lists, and other structure, follows a logical reading order, and includes alt text for images.
Adobe Acrobat and other accessibility tools can help you review and adjust these elements. Always test your PDFs before uploading them to your Elementor site to meet WCAG standards.
Monitor the readability of your digital content
There are simple things you can do to ensure your website is easy to read. Keep paragraphs short, use plain language, and break up information with headings, bullet points, and tables where appropriate.
Elementor’s Text Editor makes it easy to format your content, so take advantage of these features to create clear, organised, and accessible pages. Consistent readability testing and feedback from real users can also help you fine-tune your website’s content.
All Elementor websites are designed to be fully responsive, ensuring they display properly across different screen sizes and devices, which is essential for readability.
Use ARIA-Labels correctly
ARIA-Labels help provide context to buttons and links for screen reader users. For example, if your section has a Read More button, you could add context with aria-label=“Read more about our new product launch”.
Elementor has limited built-in ARIA support, but with Elementor Pro’s custom attributes feature, you can add ARIA attributes to an element in Edit > Advanced > Attributes.
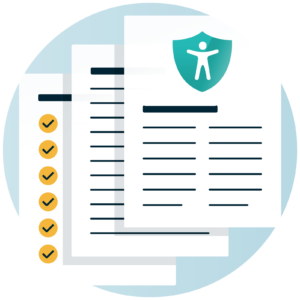
Download our Website Accessibility Checklist
Our Website Accessibility Checklist guides you through the essential elements of an inclusive website with simple, actionable steps. Whether you’re just getting started or looking to improve your existing site, this checklist will help you create a better experience for all users.
Helpful tools and strategies for accessibility compliant Elementor websites
Accessibility doesn’t happen by accident, it requires consistent testing and ongoing education. Here’s how to get started:
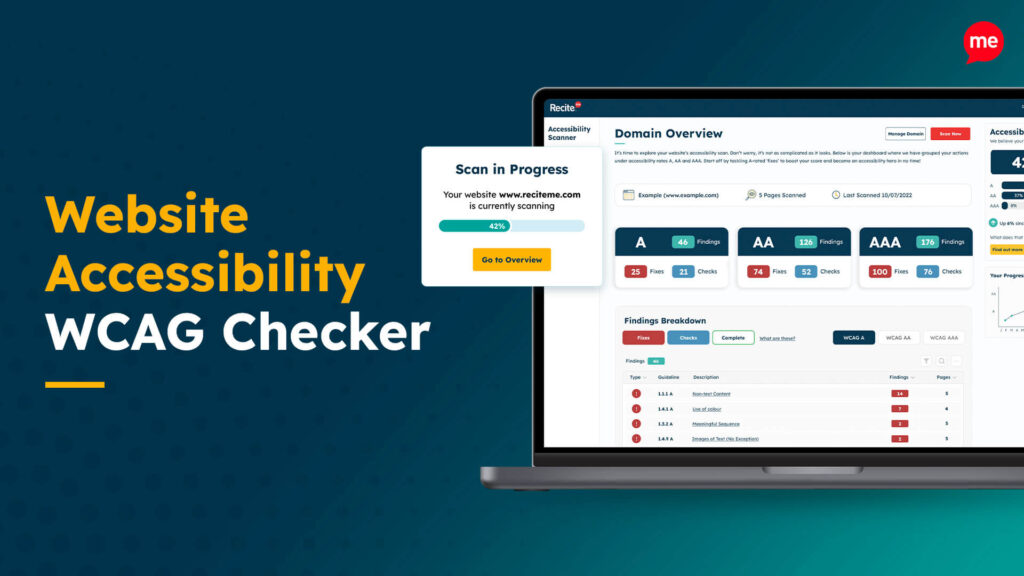
Run an automated accessibility check of your website
Automated testing is a quick way to catch many common accessibility issues on your Elementor website. Tools like our Website Accessibility Checker can scan your site and highlight problems like missing alt text, poor colour contrast, and heading structure issues. While no tool catches everything, automated checks give you a solid starting point for improving your site’s accessibility.
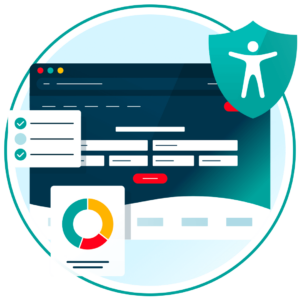
Manual testing with an accessibility checklist
Automated tools have limitations, so it’s essential to complement them with manual testing. Download the Website Accessibility Checklist to evaluate your Elementor website against WCAG standards. This checklist guides you through evaluating keyboard navigation, screen reader compatibility, logical content structure, and more, helping you uncover issues that automated scans might miss.
Accessibility training for employees contributing to your website
Accessibility is a team effort. Invest in accessibility training for everyone involved in building and maintaining your Elementor website, from designers and developers to content creators. Training ensures your team understands best practices, like using proper headings, writing descriptive link text, and designing for all users.
Final verdict on ensuring accessibility with Elementor
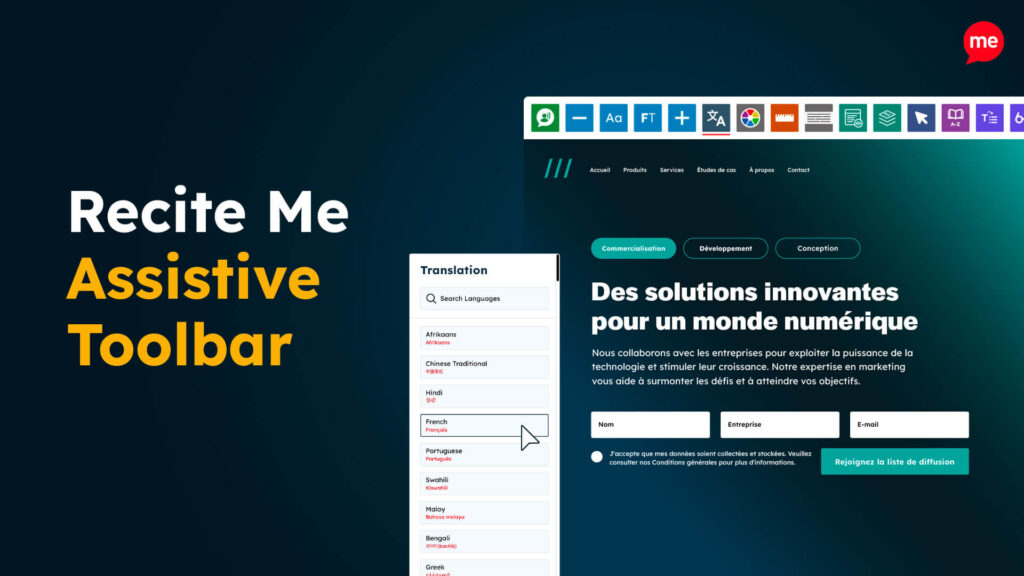
Elementor is a powerful and flexible page builder, but accessibility doesn’t come standard. Fortunately, with the right tools, training, and design strategies, you can build an Elementor site that meets WCAG standards, welcomes every user, and protects your business from legal risk. Get started today by exploring how our assistive toolbar and accessibility checker can help make your website more inclusive.
Elementor accessibility FAQs
Looking for a recap or quick summary? Here are a few of our most frequently asked questions to help you get to grips with the essentials:
Yes, alternative text allows screen readers to describe images. Add your image description to the Alt Text field within the right-hand panel of Elementor’s Media Library.