Free Accessibility Training For Web Developers
Download NowAccording to the World Health Organisation, over 1.3 billion people worldwide live with some form of disability, that represents a whopping 16% of the global population! This highlights the importance of accessible web design and the need for a UX accessibility checklist.
If you’re a web developer, user experience specialist or someone aspiring to help build an inclusive online environment, then this checklist will be essential for you. By following this accessibility checklist for developers, you can improve usability for all users, comply with legal requirements, and enhance overall site performance. Ensuring accessibility best practices at your organisation is a necessity for a truly inclusive digital world.
The role of WCAG in Accessible Web Development and User Experience
The Web Content Accessibility Guidelines (WCAG) play a crucial role in shaping accessible web design and enhancing user experience for individuals with disabilities. Developed by the World Wide Web Consortium (W3C), WCAG provides a set of standardised guidelines aimed at making web content more accessible to a wider range of people, including those with visual, auditory, physical, speech, cognitive, and neurological disabilities.
WCAG is organised around four principles, ensuring web content is:
- Perceivable: Information and user interface components must be presented in ways that users can perceive, regardless of their disabilities.
- Operable: User interface components and navigation must be operable by all users, including those relying on keyboards or assistive devices.
- Understandable: Information and the operation of the user interface must be understandable to ensure users can comprehend and use the website effectively.
- Robust: Content must be robust enough to be interpreted reliably by a wide variety of user agents, including assistive technologies.

By adhering to WCAG best practices designers and developers can create websites that provide a more inclusive user experience. There are many different levels of WCAG and new versions which continue to be released (WCAG 2.2 and WCAG 3.0). But aiming to comply with WCAG 2.1 is a great starting point on your road to inclusivity and something every organisation should aim for as a minimum.
Your Accessibility Checklist for Web Developers & UX Designers
Looking to design your website in a way that is accessible to all visitors? Get started today by addressing all of the accessibility concerns listed in this comprehensive UX accessibility checklist for web designers:
1. Text and typography
- Readable fonts: Use clear, legible fonts and avoid overly decorative fonts for body text.
- Font size: Ensure text can be resized up to 200% without loss of content or functionality.
- Line height and spacing: Use adequate line height (at least 1.5 times the font size) and paragraph spacing (at least 1.5 times the line height).
- Avoid all caps: Use mixed-case text instead of all uppercase for better readability.
2. Colour and contrast
- Contrast ratio: Maintain a contrast ratio of at least 4.5:1 for normal text and 3:1 for large text (18pt or 14pt bold).
- Colour use: Do not rely on colour alone to convey information. Use text labels or patterns in addition to colour.
- Colour-blind-friendly palette: Choose a colour palette that is accessible to colour-blind users.
3. Images and media
- Alt text: Provide descriptive alt text for all images.
- Text in images: Avoid using images of text. If necessary, ensure the same information is available as plain text.
- Captions and transcripts: Provide captions for videos and transcripts for audio content.
- Controls for media: Ensure audio and video players have accessible controls for play, pause, and volume.
4. Navigation and structure
- Consistent navigation: Use a consistent navigation structure across all pages.
- Descriptive links: Use clear and descriptive link text that makes sense out of context.
- Breadcrumbs: Include breadcrumb trails to help users understand their location within the website.
- Keyboard navigation: Ensure all navigation elements are accessible via keyboard.
5. Headings and content organisation
- Semantic structure: Use proper HTML heading tags (H1, H2, etc.) to structure content.
- Content organisation: Organise content logically with headings, lists, and sections to facilitate easy navigation.
6. Responsive design
- Flexible layouts: Use responsive design principles to ensure content adapts to various screen sizes and orientations.
- Touch targets: Ensure touch targets are large enough and have sufficient spacing to prevent accidental taps.
- Test on devices: Test the website on various mobile devices to ensure accessibility.
7. Forms and interactivity
- Labels: Provide clear and descriptive labels for all form fields.
- Instructions: Include instructions for completing forms and indicate required fields.
- Error messages: Provide clear and specific error messages with suggestions for correction.
- Keyboard access: Ensure all interactive elements (buttons, form fields, etc.) are accessible via keyboard.
8. Interactive elements
- Focus indicators: Ensure a visible focus indicator is present for all interactive elements.
- Skip links: Provide skip links to allow keyboard users to bypass repetitive content and jump to the main content.
- Predictable behaviour: Ensure interactive elements behave in predictable ways (e.g., links opening in the same window).
9. Language and readability
- Language declaration: Declare the primary language of the webpage in the HTML.
- Plain language: Use simple and clear language, avoiding jargon and complex sentences.
- Readable layout: Use adequate spacing and avoid justified text alignment to enhance readability.
10. Testing and validation
- Automated tools: Use automated accessibility testing tools to identify potential issues.
- Manual testing: Conduct manual testing with keyboard navigation and screen readers.
- User testing: Test the website with users who have disabilities to get real-world feedback and make necessary adjustments.
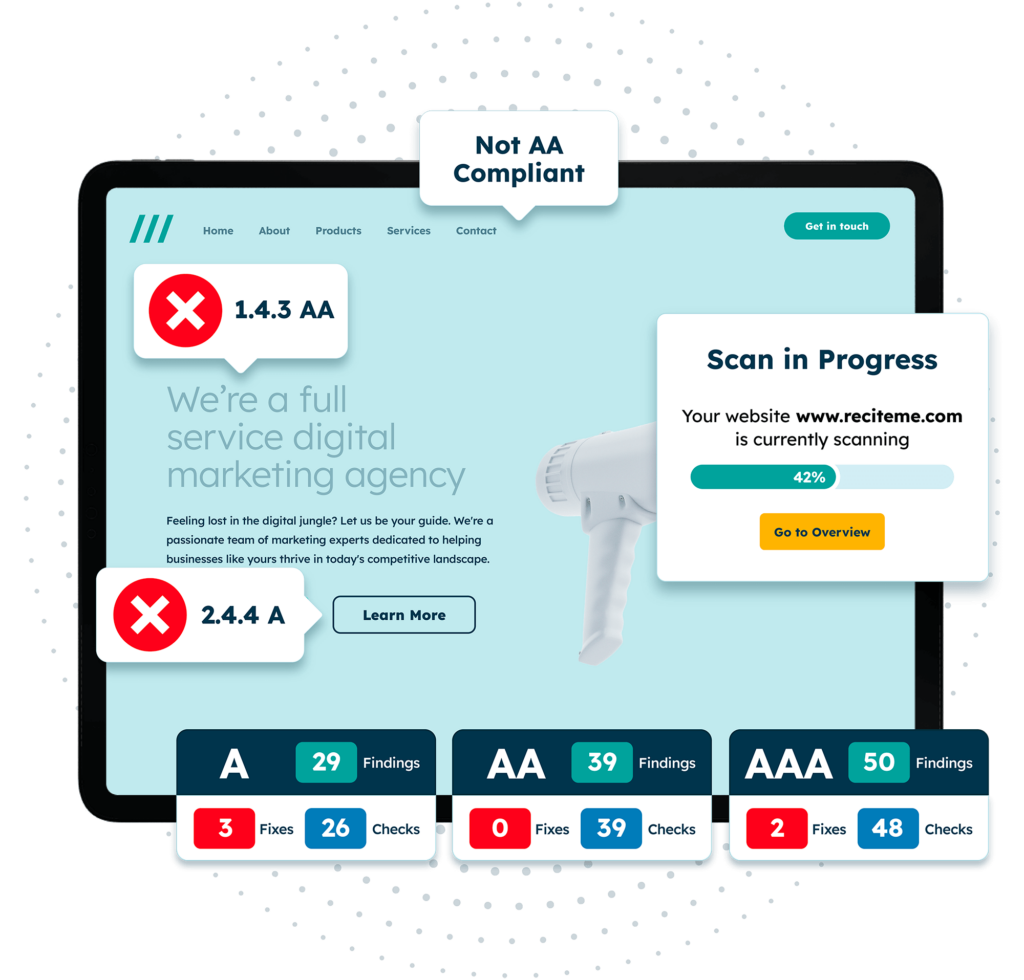
Free Accessibility Check of your Website
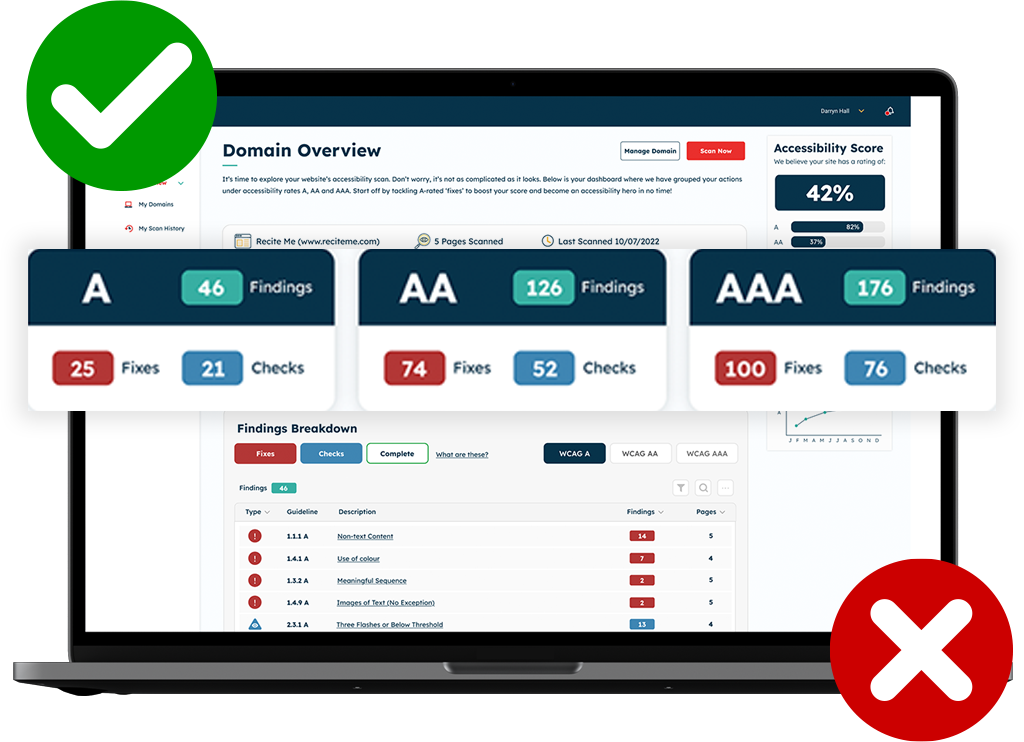
Finding accessibility issues is now easier than ever. Recite Me offers a free automated scan of your website’s homepage to highlight non-compliance. You’ll get recommendations on how to fix them, helping to improve your accessibility score.
Implementing the key areas of our UX Accessibility Checklist
Our UX accessibility checklist is perfect for getting a quick-fire overview of the different steps that can be implemented by web designers and UX experts. Read on for a more detailed explanation of each actionable step with real examples. You can use the following links to jump to different sections:
Text and typography
Choosing fonts that can be read easily by a wide variety of users is essential when designing a website. Sans-serif fonts like Arial, Helvetica, and Verdana are more legible on screens, which is important for users with conditions such as Dyslexia or ADHD. The use of non-sans-serif fonts or overly decorative fonts can be challenging for these users to read.
Furthermore, when designing your website, ensure users can resize text up to 200% without losing functionality or content. This is not only important for users with low vision or blindness, but also helps to improve the overall user experience of your website, by adding customisation.
Additionally, to enhance the readability of your web content the following spacing parameters should be coded into the web design:
- Line height to at least 1.5 times the font size.
- Paragraph spacing to at least 1.5 times the line height.
For instance, if your font size is 16px, set the line height to 24px. Additionally, avoid using all caps for text, as it can be harder to read. Instead, use mixed-case text and employ bold or italics for emphasis.
Colour and contrast
The use of colours can have a game-changing impact on the overall user experience and accessibility of your website. This is why you need to maintain adequate colour contrast across all areas of the website and user interface. Ensure a contrast ratio of at least 4.5:1 for normal text and 3:1 for large text (18pt or 14pt bold).
Additionally, select colour combinations that are accessible to colour-blind users, avoiding red-green combinations that many colour-blind individuals cannot distinguish. With these users in mind, you will also want to avoid designing in a way that relies on colour alone to convey information. For example, if indicating required fields in a form, use text labels or asterisks (*) in addition to colour.

Images and media
When designing your web page it’s likely you’ll be adding lots of images, but people with visual impairments often find it difficult to see these and can often lose a lot of information. This is why the implementation of image alt text in your UX design is critical for accessibility. Instead of using generic names like “image1.jpg,” opt for descriptions like “A cat sitting on a windowsill” to help screen readers convey the image content to visually impaired users.
Furthermore, avoid embedding text within images and if it is unavoidable make sure your image alt text accurately describes the missing context. Alternatively, you can ensure the same information from the image is available as plain text elsewhere on the page.
For multimedia content, provide captions for all videos and transcripts for audio content. Tools like YouTube’s automatic captioning can generate captions, but always review and correct them for accuracy. Moreover, as a web developer it’s essential you ensure audio and video players have accessible controls for play, pause, and volume. Using HTML5 media elements with built-in accessibility features and providing keyboard-accessible controls can help achieve this.
Navigation and structure
Our UX accessibility checklist stresses the importance of consistent navigation structure across all pages, to help users easily find and understand content. To do this you can design in a way that ensures menus and links are predictable and uniform. Additionally, use clear and descriptive link text, such as “Read our accessibility guidelines” instead of “Click here,” so users understand the link’s destination without additional context.
In addition to this, for the most optimal user experience you should include breadcrumb trails that can help users navigate back to previous pages easily and allow all navigation elements to be accessible via the keyboard.
Headings and content organisation
Using proper HTML heading tags (H1, H2, H3, etc.) to structure content logically helps screen readers and search engines understand the content hierarchy. So this is good for both accessibility and SEO, many modern CMS’ such as WordPress will have proper HTML heading tags pre-built. But, if you are developing a custom-built CMS then ensure this is available.
Additionally, organising content with headings, lists and sections can help further facilitate the idea of easy navigation. Using lists (<ul>, <ol>) for grouped items and sections (<section>, <article>) for distinct content areas.
Responsive Design
A responsive design is becoming increasingly more important for accessible web development as the importance for mobile accessibility increases. That’s why it’s been featured on our web developer accessibility checklist.
Your web design will need to adapt to various screen sizes and orientations. Achieve this by employing CSS media queries to adjust layouts for different devices. Also, be sure to make touch targets such as buttons and links large enough to be tapped easily – the recommended minimum size for this is 44×44 pixels.

Forms and Interactivity
Developing form fields that are accessible can be one of the more challenging aspects of web development. You will need to ensure you use clear and descriptive labels for all form fields. You can achieve this by using the <label> element to associate labels with their corresponding input fields for better screen reader compatibility. Provide instructions for completing forms and indicate required fields using text or symbols like an asterisk (*).
Additionally, any error messages that you create will help the user experience of your website. But, they should be clear and specific, offering suggestions for correction to ensure good accessibility. For instance, if a user leaves a required field blank, display “Please enter your email address” instead of a generic “Error”.
Keyboard accessibility should be considered again – can all interactive elements such as buttons and form fields be accessed by only using a keyboard? You should test this manually to ensure you can complete the form only using a keyboard.
Interactive Elements
When designing your website with keyboard navigation in mind you will also need a visible focus indicator present at all times for interactive elements. This should not be designed in a way that has any time limits or time restrictions applied to its use. Its use will help keyboard users track their position on the page at all times. You can further customise focus styles with the use of CSS if necessary.
Furthermore, skip links can be integrated into the development of web pages, helping to improve user experience by allowing users to bypass repetitive content and jump directly to the main content. This can be designed by adding something like a “skip to main content” link at the top of your web page.
Also, interactive elements should behave in predictable ways. For example, links should open in the same window unless specified, and form submissions should provide feedback.
Language and Readability
Be sure to declare the primary language of the webpage in the HTML using the lang attribute, e.g., <html lang=”en”>. This helps assistive technologies for blind and visually impaired users, as they rely on screen readers, which are able to better pronounce text when relevant language information is provided.
Additionally, user experience specialists should ensure all content on the page is written for a reading age of around 7 to 9 years old. Do this by breaking down complex information into smaller, manageable parts and avoiding the use of any jargon or complex language.
Testing and Validation
Using automated accessibility testing tools like the Recite Me accessibility checker can help to identify potential accessibility issues quickly. These auditing tools provide a scan of your website to provide detailed reports on accessibility problems. Although, this should be used in addition to manual testing, which can help to double check the results of the automated testing and highlight any issues the tool may have overlooked.
User testing can also be particularly useful, as it allows you to get real insights from a variety of different users. This can help identify inaccessibility but also outline areas of general user experience that could be improved.
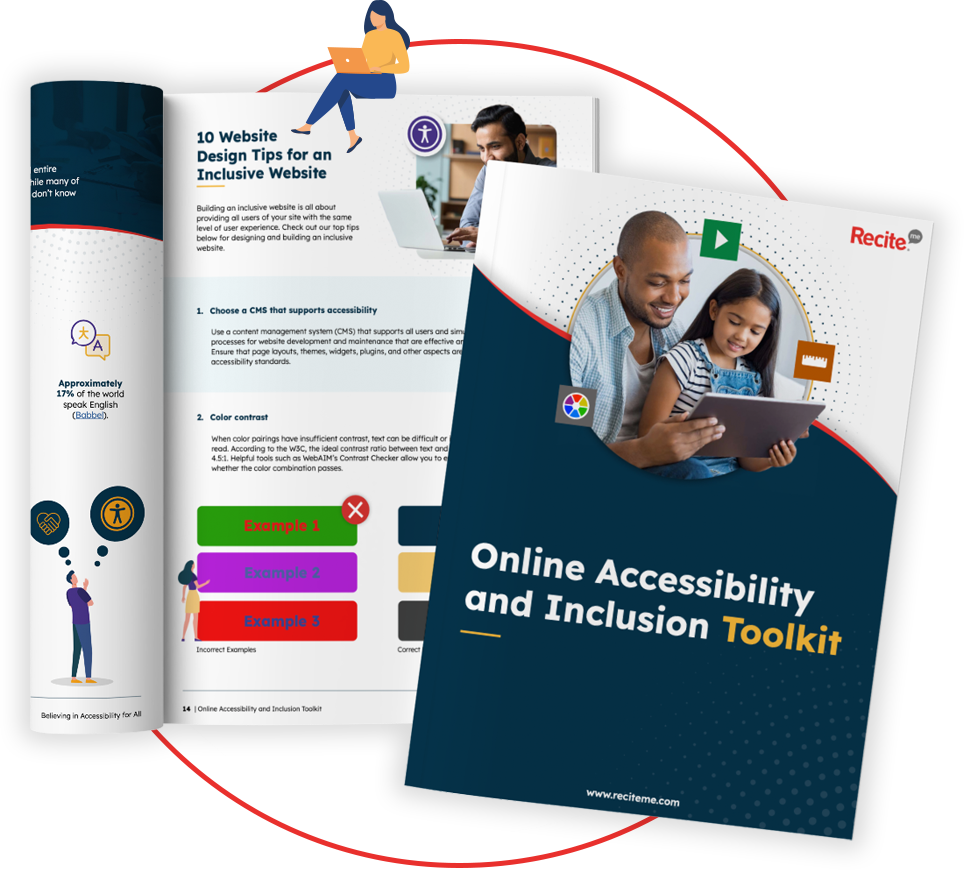
Our 40-page Digital Accessibility & Inclusion Toolkit helps businesses break down online barriers and make a real impact. It offers practical advice on all aspects of digital accessibility, from writing an accessibility statement to accessible website tips and inclusive hiring.
How to prioritise UX accessibility developments
If you’ve checked our UX accessibility checklist for web developers, then you’ll know there’s a lot of different factors you’ll need to consider in your designs. Or if you’ve already got a functioning website then there’s a lot of aspects that will need to be checked and evaluated for improvement.
So where can you start when it comes to making web design changes for improved accessibility? Start by addressing the most common accessibility failures, this includes:
- Low contrast text
- Missing image alternative text
- Missing labels for forms
- Empty links
- Empty buttons
- Missing document language
This is the simplest way to approach accessibility with your development or user experience teams. However, if you have extensive data on your website visitors and their demographics then you could use this to prioritise changes on this basis.
For example, if you know a high percentage of your visitors suffer from visual impairments, then prioritising changes such as image alt text and colour contrasts could be more beneficial. Whereas if a high percentage of your users have mobility issues or neurodivergent conditions such as Cerebral Palsy then factors such as keyboard navigation might be a better priority to address.
UX Accessibility tools for Web Development specialists
For web development specialists focusing on UX accessibility, a variety of tools can help ensure websites are accessible to all users, including those with disabilities. These tools speed up tasks which would otherwise be extremely slow, inefficient and manual.
The key tool that will help you address the issues in our web designer accessibility checklist is an accessibility checker. These tools automate the process of testing for accessibility failures on your website, by highlighting them and making recommendations for improvements. If this tool is combined with the process of manual accessibility testing it creates a comprehensive method to identify and eliminate accessibility errors on your website.
You can run a free accessibility check of your website’s homepage now with the Recite Me accessibility checker.
The Importance of Regular Accessibility Testing
Accessibility testing can not be approached with a one-and-done type mentality. As you continue to update your website and add new content, it must be audited continuously. Here’s some of the main reasons why accessibility testing is a continuous process:
- Changing standards: As the world continues to evolve and grow, so do accessibility standards. WCAG has had many evolutions of its guidelines, with WCAG 3.0 being one of the newest developments. Regular testing means you can adapt to new standards and guidelines as they’re published.
- Adapting to new tech: Just as accessibility standards evolve, so does technology. As more new types of assistive technology are introduced, it will be important that your web is designed in a compatible way to these new technologies.
- Content updates: As a developer you’ll play a key role in updating websites for new design, content and functionality changes. This has the potential to introduce new accessibility issues which will need to be addressed as soon as possible. Testing helps to ensure you can catch these problems early.
- User experience: Regular testing ensures that websites are accessible to all users, including those with disabilities such as visual, auditory, cognitive, or motor impairments. This inclusivity leads to a better overall user experience. Additionally, accessibility best practices overlap with general usability principles, leading to a more intuitive and user-friendly site for everyone.
- Cost-efficiency: Regular testing helps detect accessibility issues early in the development process, reducing the cost and time required for later fixes. Moreover, by incorporating accessibility into your regular development cycle, you can make incremental improvements, avoiding the need for expensive overhauls.
Regular accessibility testing is not just about compliance, it’s about creating a better, more inclusive web experience for everyone. By making accessibility a regular part of your web development process, you ensure that your site is usable, legal, and enjoyable for all users.

Kickstart your accessibility journey with Recite Me
Act today to ensure your website is accessible and compliant with the latest WCAG standards. Get started on your website accessibility strategy by working through the following action points:
- Contact our team for more advice about WCAG standards and Accessibility best practices.
- Find out more about the Recite Me Web Accessibility Checker.
- Schedule a free demonstration to learn how our technology can help you.
- Run a free scan of your website for WCAG 2.1 AA compliance.
- Try our assistive toolbar on your website.